Monday, November 27, 2017

Thanksgiving Recipes 2017


Thanksgiving is always my favorite holiday of the year of course since it is centered around food and family. My in-laws came in town for a week, so we had plenty of meals together including the main event on Thursday. 


Leading up to that week, my work had a potluck and I brought this cute veggie tray! So happy with how it turned out. We decided he looked more like an Angry Bird though haha!


My friend Amanda also hosted a Friendsgiving the weekend before and I made a baked brie. I’ve done this recipe several times before, but I tried a new version this time with toasted pecans and Trader Joe’s apple jam. You can use whatever type of nut and jam combination you like (here’s the recipe from awhile back on my blog…)


Tuesday night before Thanksgiving we had both sets of parents over and tried out a recipe I’d never made before – Baked Four Cheese Butternut Squash Rigatoni. I’ve recently become obsessed with the food blog Half Baked Harvest. Everything I’ve tried from that website is incredible (actually 2 of my recipes this year were from her!) Since I was cooking this after work and didn’t have 
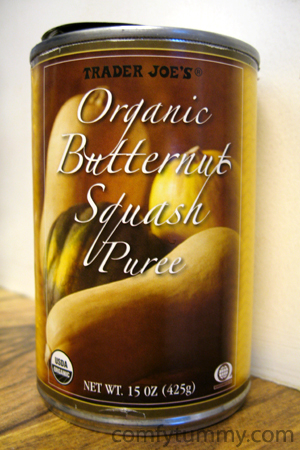
much time, I used Trader Joe’s canned butternut squash puree rather than cooking a squash and scooping out the insides myself.

Thanksgiving dinner was at my Grandma Pat & Grandpa Craig’s house this year. They just moved into a new place which has a huge kitchen so it’s perfect for entertaining. We ended up with 19 people this year and more food than I think we’ve ever had any other Thanksgiving yet. My contributions were Maple Roasted Carrots in Hummus Sauce with Pomegranates and Pistachios as well as a Wild Rice Salad with Cranberries and Nuts.  


Then on Friday, we had some friends and their parents over. I made my go-to easy Pesto Crockpot Chicken, but then tried another Half Baked Harvest recipe – Brown Sugar and Pineapple Acorn Squash with Spiced Brown Butter. I think this is now my favorite way to make squash – it’s almost like dessert.


I’d say all the new recipes this week were a success and I’ll definitely use them again!  What were your favorite dishes this Thanksgiving? Send recipes you love my way because I’m always looking for new ones!


Baked Four Cheese Butternut Squash Rigatoni (adapted from Half Baked Harvest)

Ingredients:
  • 1 can butternut squash puree (found at Trader Joe’s)
  • 1 head garlic, outer skins removed
  • 2 T olive oil
  • Salt & pepper
  • 1 pound rigatoni
  • 1 cup whole milk
  • 2 t dried oregano
  • 2 t dried thyme
  • 1 cup whole milk ricotta cheese
  • 2 cups fresh baby spinach
  • ½ cup oil packed sun-dried tomatoes, chopped
  • 1 cup grated parmesan cheese
  • 1 cup shredded asiago cheese
  • 1 cup mozzarella cheese
  • Turkey pepperoni (recipe called for 8-10 but we used way more!)  

Directions:

1. Preheat oven to 400 degrees F.

2. Chop the top 1/3 of the garlic off to reveal the cloves. Place in a muffin tin and drizzle with olive oil, salt, and pepper. Bake 20-30 minutes or until the garlic is soft enough to squeeze out of the skin. Turn the oven to 450 degrees.

3. Boil pasta in a large pot until al dente. Reserve 1-1/2 cups of the water before draining.

4. Add the butternut squash, roasted garlic, and reserved pasta water, milk, oregano, and thyme to a blender. Season with salt & pepper and pulse until smooth. Add the ricotta and pulse until just combined.

5. Pour the butternut squash over the pasta and set the pot over medium heat. Add the spinach, sundried tomatoes, and ¼ cup of oil from the sun-dried tomato jar. Toss to combine. Cook until the spinach is wilted and the sauce is hot, about 5 minutes.

6. Remove from the heat and stir in the parmesan and asiago cheeses. Spread the pasta in an even layer in a 9x13 baking dish and top with mozzarella and pepperoni. Place in the oven and bake for 10 minutes or until the cheese is melted and gooey.


Maple Roasted Carrots with Hummus Drizzle, Pomegranates & Pistachios (adapted from Closet Cooking)

Ingredients:
  • 2 pounds carrots, peeled (I used Trader Joe’s multicolored kind)
  • 2 T olive oil
  • 1 T maple syrup
  • 2 T garlic hummus (or regular hummus and add grated garlic)
  • 2 T lemon juice
  • 1 T parsley (I used the Gourmet Garden parsley paste that comes in a tube - it keeps way longer and tastes fresher than dried parsley) 
  • 2 T pomegranate arils (click here if you need instructions on how to remove the arils yourself)
  • 2 T pistachios, chopped

Directions:

1. Preheat oven to 400 degrees F.


2. Toss the carrots in a mixture of 1 T olive oil and 1 T maple syrup. Arrange them in a single layer on a baking sheet. Rub each carrot with a bit of parsley, then roast until tender, about 20-30 minutes, turning once in the middle.

3. Mix together the hummus, 1 T olive oil, and lemon juice until it creates a thin drizzle.


4. Serve the carrots topped with the hummus, pomegranates & pistachios.


Wild Rice Salad with Cranberries and Nuts (adapted from The View from Great Island)

Ingredients:
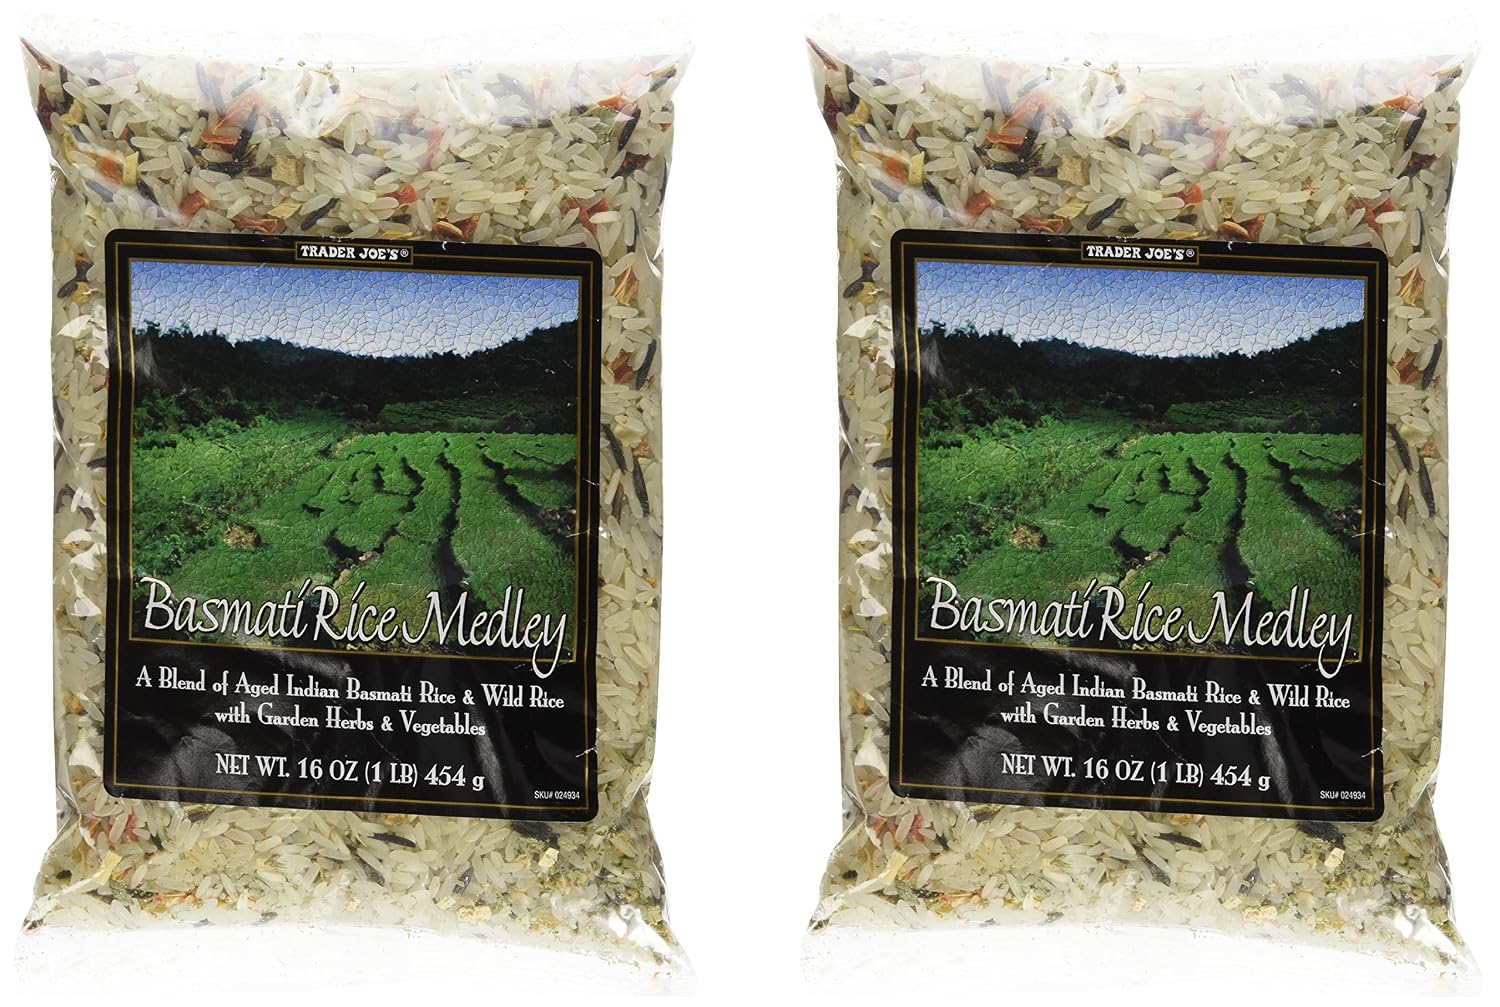
  • 1 cup wild rice (we used Trader Joe’s Basmati & Wild Rice Medley which already has some seasonings)
  • ¼ cup pecans
  • ¼ cup cashews
  • ¼ cup pistachios
  • ¼ small red onion
  • Sevral small inner stalks of celery with leaves
  • 3 green onions
  • ½ cup dried cranberries
  • ¼ cup olive oil
  • 1 T balsamic
  • 1 T lemon juice
  • 1 t whole grain mustard
  • 1 t honey
  • Salt and pepper, to taste

Directions:

1. Cook the rice according to the package.


2. While the rice is cooking, chop the pecans and cashews into pieces and put them on a baking sheet in a 375 degree oven until just toasted (keep an eye on them so they don’t burn!)


3. When the rice is finished, add the nuts, red onion, celery, green onion, and cranberries.


4. Combine the olive oil, balsamic, lemon juice, mustard, honey, salt and pepper in a jar with a lid. Shake vigorously. Toss the salad with half the dressing and refrigerate until chilled.


5. When ready to serve, toss with the remaining dressing.

Brown Sugar and Pineapple Roasted Acorn Squash with Spiced Brown Butter (adapted from Half Baked Harvest)

Ingredients:
  • 2 large or 3 small acorn squash, cut into wedges, seeds removed and reserved
  • 2 T brown sugar
  • 1 – 8.5 oz can crushed pineapple, drained
  • 6 T butter plus more for greasing the pan
  • 1 T olive oil
  • 1-1/2 t ground cinnamon
  • 1-1/2 t chili powder
  • ½ t pepper
  • Dash of red pepper
  • Arils from 1 pomegranate

Directions:

1. Preheat your oven to 400 degrees F. Grease a 9x13 pan with softened butter.

2. Line squash wedges on a prepared pan. Evenly sprinkle them with brown sugar, salt and pepper. Spoon the crushed pineapple over the wedges.

3. Place butter in a small saucepan over medium heat until it melts, foams, froths, and begins to brown along the bottom. Remove from the heat and whisk the browned bits of butter off the bottom of the pan, adding in cinnamon, chili powder, and pepper.

4. Pour the butter over the squash, then cover with foil and place in the oven.

5. Roast for 30 minutes, then remove the foil and roast for another 30 minutes until the squash is tender and caramelized.

6. While the squash roasts, clean and dry the seeds. Season them with olive oil, salt, pepper, and red pepper and toss to coat. Toast the seeds in the oven until golden brown.

7. Sprinkle your squash with pomegranate arils and squash seeds.


Sunday, October 8, 2017

The Dessert Spot at Toffee to Go – Tampa, FL


Toffee to Go is a Tampa institution that’s been around for nearly 20 years. I had the privilege this week of having lunch with its founder and co-owner, Lisa Schalk, through my friend Rayla Bailey’s group On Fridays we Lunch. Rayla focuses on a different local female leader each month and arranges incredible lunches with young professionals to hear their success stories.


I already was very familiar with Toffee to Go - my mom worked there during one of their busy holiday seasons and the architecture firm I work for gave their gift boxes to clients last Christmas.  We had a million thank-you notes, so we’re planning to repeat the gifts again this year. I’d highly recommend it for corporate gifts since its so simple and it’s guaranteed to make everyone happy – all you need to do is give them your list of names & addresses and they do all the rest.


Lisa runs the company with her husband, Jim, whose family recipe inspired their business. At first they made it just as a gift for friends, but everyone was so impressed by the treats, they decided to start selling it. It started spreading by word of mouth, then Jim quit his job in the hotel industry to join Lisa in the toffee business full-time. 

They’ve grown from an in-home operation to now running a retail shop in Tampa and 16,000 square foot warehouse in St. Pete. Their product is so amazing that it even ended up on Oprah’s Favorite Things list!

The thing I’m most impressed by is that they have made enormous sacrifices to make their business a success. In the early years, Jim would travel for trade shows regularly, so they went 9 years straight without having a Thanksgiving together. They’ve had to turn down countless holiday parties because 80% of their business occurs in a 2-month window. 

Despite all the hard work, Lisa said that all the long hours are worth it because she loves what she does and it makes so many people happy.


This upcoming week they will launch their latest endeavor – The Dessert Spot at Toffee to Go! They’ve teamed up with other local small businesses so their Bay to Bay location will now offer Kahwa coffee, Working Cow ice cream, and Mike’s Pies. In addition, the shop will feature an assortment of decadent sweets by their pastry chef, Sharon Nasrallah, who previously was an instructor at Le Cordon Bleu College of Culinary Arts in Orlando. Their daughter, Courtney Schalk, will be the General Manager of The Dessert Spot.


I stopped by for a sneak preview this weekend. The shop has been completely renovated with beautiful high ceilings, wood-look tile floors, a new seating area, and large display cases showcasing all the treats.


I tried a coffee ice cream with chunks of their dark chocolate pecan toffee (I realized I devoured it so quickly I didn’t get a photo).  We also brought home the most gooey, delicious cake topped with chunks of toffee and a light, airy amaretto cookie. Everything looked amazing, so I’ll need to return soon to try more!


The Dessert Spot at Toffee to Go is located at 3251 W. Bay to Bay Boulvard, Tampa, FL 33629.  They officially open for business 10am on Monday, October 9th and will be open 10am – 9pm Monday through Thursday and 10am – 10pm on Fridays & Saturdays. Go check them out! 

Friday, August 25, 2017

Mediterranean Stuffed Sweet Potatoes


We had our friend Vimmi over for dinner the other night. Since she’s vegetarian, I scanned my “Vegetarian Meals” Pinterest board for ideas. She’s also allergic to gluten, so that vetoed a lot of the options like pasta and pizza. But I came across this recipe for Mediterranean stuffed sweet potatoes and it’s one of my new favorites. It was great served hot, as well as cold leftovers a few days later. 

We cooked the sweet potatoes in the crock pot while at work which is how I’m always going to cook them from now on. It requires zero effort and they turn out perfectly soft inside. 

Recipe (adapted from A Saucy Kitchen)

Ingredients:
  • 1 15 oz can chickpeas (garbanzo beans)
  • 3 T extra virgin olive oil
  • 2 T fresh lemon juice, divided
  • 1 T lemon zest
  • 1 clove garlic, crushed
  • 2 T chopped fresh parsley, divided
  • ¼ t sea salt
  • 1 medium ripe avocado
  • ¼ cup garlic hummus (or you can use regular hummus and add a clove of garlic)
  • ¼ cup pepitas (pumpkin seeds)
  • Crumbled feta cheese
Directions:

1. Scrub your sweet potatoes, poke holes in them, and wrap them in foil. Cook them on low in a crock pot for 6-8 hours.

2. In a medium bowl, combine chickpeas, olive oil, 1 T lemon juice, lemon zest, 1 clove garlic, 1 T parsley, and sea salt. Toss to marinate then set aside.

3. In a food processer, blend the avocado, garlic hummus, 1 T parsley, and 1 T lemon juice.


4. Assemble your sweet potatoes. Depending on how hungry you are, either cut a slit in the potatoes to stuff them, or serve half a potato per person (our potatoes were large, so we only ate half per person). Spread the avocado sauce over the potato, then top with the marinated chickpeas, pepitas, and feta. Enjoy!  

Sunday, July 30, 2017

Raspberry Whiskey Smash


I saw this video on Instagram recently for a Blackberry Bourbon Smash. 

We decided to try out a variation of this recipe using raspberries & whiskey instead. It was super easy and impressive enough that we agreed it would go for $10-$12 if you went to a bar with fancy cocktails. Make it yourself at home for a fraction of that.  

Raspberry Whiskey Smash (adapted from Half Baked Harvest)

Ingredients:
  • Handful of fresh raspberries (about 10), a few extra to garnish
  • 7 mint leaves, a sprig extra to garnish
  • Juice and zest from half a lemon
  • 1-2 T honey
  • 1 oz whiskey
  • Ginger beer (or ginger ale)
  • Granulated sugar


Directions:

1. On a shallow plate, combine sugar and the lemon zest (could use lime if you prefer). Run the lemon wedge around the edge of your glass, then invert onto the plate to create a sugar/lemon rim.

2. In a cocktail shaker (or we used a large mason jar), add your raspberries, mint, lemon juice and honey. Use a muddler to smash the ingredients together and release the juices. Add the bourbon and muddle a bit more.


3. Add crushed ice to your rimmed glass, then pour the drink over the ice. Top with ginger beer and garnish with the extra raspberries and mint sprig. 

*This recipe is for one drink, but multiply it for as many drinks as you'd like! 

Monday, July 24, 2017

Slow Cooker Corn & Potato Soup with Sautéed Shrimp


I’ve built up an assortment of cooking magazines from over the years, but I’m not very good and taking them off the shelf and using them. Most of the time I end up picking our meals from Pinterest.

I have a collection of Rachael Ray Every Day, Bon Appétit, Southern Living and Cooking Light. We wanted something easy for dinner this week, so I found a slow cooker soup recipe from the August 2016 issue. This soup was even better as leftovers when we added some shredded chicken to it!

Slow Cooker Corn & Potato Soup with Sautéed Shrimp (adapted from Cooking Light)

Ingredients:
  •        7 ears yellow corn, shucked
  •        4 cups unsalted chicken stock
  •        1 tablespoon chopped fresh thyme
  •        1 1/2 teaspoons kosher salt, divided
  •        6 small red potatoes, cut into 3/4-in. pieces
  •        1 cup half-and-half
  •        1/4 cup unsalted butter, divided
  •        1 teaspoon black pepper
  •        Sprinkle of Old Bay seasoning
  •        1 pound medium shrimp, peeled and deveined
  •        3 tablespoons chopped fresh chives, divided
  •        Optional: cooked chicken, shredded (great way to use leftover rotisserie)


Directions:

1. Cut kernels from corn cobs to measure about 4 cups. Using the dull side of a knife blade, scrape liquid from corn cobs directly into a 6-quart slow cooker.

2. Add cobs and 3 cups kernels. Stir in chicken stock, thyme, 1 teaspoon salt, and potatoes. Cover and cook on LOW for 7 hours and 30 minutes.

3. Discard cobs. Stir half-and-half and 2 tablespoons butter into corn mixture. Transfer corn mixture to a blender (depending on your blender size, you may have to do half at a time). Remove center piece of blender lid (to allow steam to escape); secure lid on blender. Place a clean towel over opening in lid (to avoid splatters). Process until smooth. Pour into a large bowl. Stir in pepper.

4. Melt remaining 2 tablespoons butter in a large skillet over medium heat; cook 2 minutes or until foamy. Add shrimp, remaining 1 cup corn kernels, and remaining 1/2 teaspoon salt to pan; sprinkle with Old Bay seasoning.  Cook 4 minutes or until shrimp turn pink and are done, stirring occasionally.

5. Stir in 1 1/2 tablespoons chives. Divide soup among 10 shallow bowls; top evenly with shrimp mixture, and sprinkle with remaining 1 1/2 tablespoons chives.

Saturday, June 17, 2017

Candied Bacon


My mother-in-law Rita made this amazing candied bacon for Easter that was instantly devoured. It’s Lance’s grandmother’s recipe and it truly is candy (it’s probably more brown sugar than it is bacon). 

My dad loved it so much that I’ve made some in preparation for Father’s Day brunch tomorrow. It’s really easy but takes some time since it needs 2 hours in the oven. 

I slightly revised the recipe based on the candied bacon our friend Spencer made for a potluck last month – his recipe included fennel seeds which adds a hint of a licorice taste. If you don’t like that spice, you can omit it, but I like the extra layer of flavor it adds. 

You could half this recipe and just make one pound, but it gets eaten so quickly I went ahead and made two pounds this time. You could probably use a bit less brown sugar since I had some extra, even though I really coated the bacon. 

Candied Bacon  

Ingredients:
  • 2 pounds thick-cut bacon
  •  1-1/2 cups brown sugar
  • Heaping teaspoon dry mustard
  • Heaping teaspoon smoked paprika
  • Pepper to taste (can use peppered bacon if you’d like)
  • Fennel seeds as garnish
Directions:

1. Preheat oven to 300 degrees.

2. You’ll need a broiler pan with a bottom tray. Put a layer of water in the lower half of the pan and bacon on the top layer touching.


3. Mix together the brown sugar, mustard, paprika, and pepper in a bowl. Spread generously on top of the bacon. Sprinkle with fennel seeds.

4. Bake for two hours. Make sure it is fully cooked (may take longer depending on the thickness of the bacon).


5. Remove from oven and let cool on a wire rack. Cut into desired sized pieces & try not to eat a whole pound yourself.  

Blue Apron


I’ve never tried a meal kit delivery service before, but when my friend Phil said that he had free Blue Apron meals he could share with friends, I decided it’d be worth seeing what all the fuss is about. 

I love to cook at home and try out new recipes. The benefit of a meal kit delivery service is that it takes a lot of the hassle out of meal planning, grocery shopping, and some of the preparation.

I signed on to the Blue Apron website and chose the 2-person plan, which gives you three meals that feed two. Had I not had the free trial coupon, this would normally run $59.94/week, or $9.99 per serving.  They also have a family plan, which gives you 2 meals that feed 4 for $71.92, or $8.99 per meal.

They give you six meals to select from and you pick your favorite three for delivery. We chose the Persian-Style Chicken and Crispy Rice, Crispy Catfish & Spicy Vegetable Curry, and Seared Steaks & Salsa Verde. You then pick your preferred delivery date & wait for your box of food to arrive. You can skip weeks that you don’t want to cook, plan to be out of town, or don’t love the options.


We thoroughly enjoyed the three meals we chose – see recipes below. However, there are some definite pros and cons of Blue Apron:

Pros:
  • All the meals we had were fantastic. We were impressed with the quality of the ingredients and I wouldn’t have thought to try these meals on my own.
  • It saves you time getting all these ingredients from the grocery store.
  • Some of the ingredients aren’t typical foods or spices you’d have in your pantry. Our recipes included things like pink lemons, dried currants, a Makrut lime leaf, and a spice blend of cardamom, cumin & turmeric. 
  • Everything is already measured for you, which saves on cooking prep time.
  • It’s cool to go on the Blue Apron Instagram and see people from all over the country cooking the same meals as you (my brother and his girlfriend Kim chose the same three meals as us this past week!)
  • We had a lot of fun cooking together & gives us an excuse for a date night without going out and spending money at a restaurant.


Cons:
  • It’s expensive. Although it is significantly cheaper than eating out, I could go to the grocery store and buy similar ingredients.
  • It only covers you for three dinners of the week – you still need to grocery shop or eat out for the other 4 dinners of the week, breakfast, and lunch.
  • It doesn’t make enough for leftovers. The portions are just enough for two people to eat – which is great for some people, but we usually cook extra food if we take the effort to make a good meal so we can take leftovers for lunch.
  • You can’t be too picky. This is NOT a problem for us since we will eat anything and love to try new foods, but you only have 6 recipes to pick from, which can be an issue with finicky eaters or people with allergies. I have a sensitivity to almonds, so I had to substitute for walnuts in our pantry in one of our recipes.
  • You use a lot of pots, pans & tools in preparing these meals, so you’ll have dishes to do. These aren’t one pot recipes. You’ll need basic tools like a zester and vegetable peeler, so if you’re a beginner chef/novice, you may not have all the tools. The recipes aren’t basic, so you’ll do some multi-tasking. I found them pretty easy to follow, but I cook a lot.
  • Don’t plan to have it delivered on a day you want to cook. We chose Thursday as our delivery and it didn’t arrive until 8:22pm (we gave up on waiting and made BLTs that night).
  • There is SO MUCH PACKAGING. Every individual food is wrapped up which seems incredibly wasteful and unsustainable. It arrives in a large box with insulated silver bubble wrap, giant freezer packs, and plastic around everything. It makes sense that it needs to survive the shipping process, and it certainly makes it convenient, but to have 3 T of flour in its own package seems crazy.
I’m really happy that we had the chance to try it out, and if I had a half off coupon, I’d definitely order again. The meals were way better than what I would have made otherwise that week. But I actually enjoy grocery shopping and picking my own meals, so I wouldn’t sign up to get this regularly. You can go on the Blue Apron website and get their current recipes, so if you don’t mind the hassle of grocery shopping, you could pick up the ingredients yourself.

It would be interesting to try out some of the other meal kits – Blue Apron has plenty of competition out there with Hello Fresh, Plated, Sun Basket, and even Publix’s new grab-and-go meal kits.  Have any of you tried these services? What did you think?

Persian-Style Chicken & Crispy Rice with Summer Squash, Currants & Lemon Yogurt

Ingredients:
  •        10 Ounces Chopped Chicken Breast
  •       ½ Cup Jasmine Rice
  •         ½ Cup Plain Greek Yogurt
  •         1 Pink Lemon
  •         1 Summer Squash
  •         1 Yellow Onion
  •         1 Bunch Parsley
  •         3 Tablespoons Roasted Almonds (I substituted for walnuts since I have sensitivity to almonds)
  •         1½ Tablespoons Dried Currants
  •         2 Tablespoons Butter
  •         1½ Teaspoons Persian Chicken Spice Blend (Ground Cardamom, Ground Cumin, & Ground Turmeric)


Directions:

1. Preheat the oven to 475ºF.

2. In a small pot, combine the rice, a big pinch of salt, and 1 cup of water. Heat to boiling on high. Once boiling, cover and reduce the heat to low. Cook 12 to 14 minutes, or until the water has been absorbed and the rice is tender. Turn off the heat and fluff the cooked rice with a fork.

3. Transfer half the cooked rice to a sheet pan; spread into an even layer. Set the remaining cooked rice aside in a warm place.

4. While the rice cooks, wash and dry the fresh produce. Peel and thinly slice the onion. Quarter the squash lengthwise; cut crosswise into ¼-inch-thick pieces. Roughly chop the almonds. Roughly chop the parsley leaves and stems.


5. Using a peeler, remove the yellow rind of the lemon, avoiding the white pith; mince the rind to get 2 teaspoons of zest (or use a zester). Quarter and deseed the lemon. Place the currants in a bowl; top with the juice of 2 lemon wedges.

6. Pat the chicken dry with paper towels and transfer to a bowl. Season with salt, pepper, and the spice blend; toss to coat. In a medium pan (nonstick, if you have one), heat 2 teaspoons of olive oil on medium-high until hot.


7. Add the seasoned chicken and cook, stirring occasionally, 5 to 7 minutes, or until browned and cooked through. Leaving any browned bits (or fond) in the pan, transfer to a plate and set aside in a warm place.

8. Add the butter to the pan of reserved fond and heat on medium-high until melted. Add the onion; season with salt and pepper. Cook, stirring frequently, 5 to 7 minutes, or until lightly browned and slightly softened.


9. Add the squash; season with salt and pepper. Cook, stirring frequently, 5 to 7 minutes, or until softened. Add the almonds, cooked chicken, and half the parsley; season with salt and pepper. Cook, stirring frequently, 30 seconds to 1 minute, or until thoroughly combined. Turn off the heat and season with salt and pepper to taste.

10. While the vegetables cook, drizzle the sheet pan of cooked rice with olive oil. Bake, stirring halfway through, 7 to 9 minutes, or until lightly browned and crispy. Remove from the oven and let stand for at least 2 minutes.

11. Carefully transfer to the pot of remaining cooked rice. Stir in the currants (including any liquid). Season with salt and pepper to taste.

12. While the rice bakes, in a bowl, whisk together the lemon zest, yogurt, the juice of the remaining lemon wedges, and 1 teaspoon of water. Season with salt and pepper to taste.


13. Divide the finished rice between 2 dishes and top with the finished chicken and vegetables. Top with spoonfuls of the lemon yogurt. Garnish with the remaining parsley. Serve with the remaining lemon yogurt on the side. Enjoy!


Thoughts: I would definitely try this recipe again. It had a great variety of flavors and textures. I normally think that rice is a waste of calories, but having the crispy rice and currents mixed it really elevated the dish. I thought I’d only want a little dollop of the lemon yogurt on top, but we ended up using it all. The Persian spice blend smells delicious. I would have liked to make extra to have leftovers.


Enjoyed this meal with a bottle of the Dreaming Tree Crush red wine – it’s actually a collaboration between Dave Matthews and Sean McKenzie.

Crispy Catfish & Spicy Vegetable Curry with Charred Lime

Ingredients:
  • 2 Catfish Fillets
  • 1¾ Cups Light Coconut Milk
  • 9 Ounces Bok Choy
  • 2 Carrots
  • 2 Cloves Garlic
  • 1 Lime
  • 1 Pound Yukon Gold Potatoes
  • 1 Bunch Cilantro
  • 3 Tablespoons Rice Flour
  • 1 Fresh Makrut Lime Leaf
  • 2 Tablespoons Red Curry Paste
  • 1 Tablespoon Sugar


Directions:

1. Wash and dry the fresh produce. Medium dice the potatoes. Peel the carrots; thinly slice into rounds. Peel and roughly chop the garlic. Cut off and discard the root ends of the bok choy; roughly chop the leaves and stems.


2. Using a peeler, remove the green rind of the lime, avoiding the white pith; mince the rind to get 2 teaspoons of zest (or use a zester). Halve the lime crosswise. Roughly chop the cilantro leaves and stems.

3. In a large, high-sided pan (or pot), heat 2 teaspoons of olive oil on medium-high until hot. Add the potatoes and cook, stirring occasionally, 12 to 14 minutes, or until lightly browned and softened. Season with salt and pepper.

4. Add the carrots, garlic, and as much of the curry paste as you'd like, depending on how spicy you'd like the dish to be. (If the pan seems dry, add 1 teaspoon of olive oil.) Cook, stirring frequently, 1 to 2 minutes, or until fragrant and thoroughly combined.


5. To the pan, add the coconut milk (shaking the can just before opening), sugar, lime leaf, bok choy, and ¼ cup of water; season with salt and pepper. Cook, stirring occasionally, 11 to 13 minutes, or until the bok choy leaves have wilted and the liquid is slightly thickened. Turn off the heat.


6. Carefully remove and discard the lime leaf. Stir in the lime zest and season with salt and pepper to taste.

7. While the curry cooks, in a medium pan (nonstick, if you have one), heat 2 teaspoons of olive oil on medium-high until hot. Add the lime halves, cut side down, and cook 2 to 3 minutes, or until charred. Transfer to a work surface and let cool. Wipe out the pan.


8. While the curry continues to cook, place the flour on a plate. Pat the catfish fillets dry with paper towels; season with salt and pepper on both sides. Thoroughly coat 1 side of each seasoned fillet in the flour (tapping off any excess). Transfer to a separate plate.


9. In the same pan, heat 1 tablespoon of olive oil on medium-high until hot. Add the fillets, coated side down, and cook 5 to 7 minutes on the first side, or until lightly browned. Flip and cook 2 to 3 minutes, or until lightly browned and cooked through. Turn off the heat.

10. Divide the finished curry between 2 bowls. Top with the cooked catfish fillets. Garnish with the charred lime halves and cilantro. Enjoy!


Thoughts: This recipe actually made enough that we had some leftover (we made nachos another night topped with curried veggies). The catfish didn’t get as crispy as I would have liked but it was very tasty regardless. This makes me want to buy bok choy more often to incorporate it in meals.

Seared Steaks & Salsa Verde with Fingerling Potatoes, Asparagus, & Radishes

Ingredients:
  • 2 Top Sirloin Steaks
  • 3 Ounces Radishes
  • 2 Cloves Garlic
  • 1 Pink Lemon
  • 1 Bunch Asparagus
  • ½ Pound Fingerling Potatoes
  • 1 Bunch Parsley
  • 1 Tablespoon Capers


Directions:

1. Preheat the oven to 450°F.

2. Wash and dry the fresh produce. Halve the potatoes lengthwise. Cut off and discard the ends of the radishes; quarter lengthwise. Cut off and discard the tough, woody stem ends of the asparagus; cut into 1-inch pieces on an angle, leaving the pointed tips intact.


3. Peel and finely chop the garlic; using the flat side of your knife, smash until it resembles a paste (or use a zester). Quarter and deseed the lemon. Roughly chop the parsley leaves and stems.

4. Place the potatoes on a sheet pan. Drizzle with olive oil and season with salt and pepper. Arrange in a single, even layer, cut side down. Roast 14 to 16 minutes, or until golden brown and tender when pierced with a fork. Remove from the oven and set aside in a warm place.

5. While the potatoes roast, pat the steaks dry with paper towels; season with salt and pepper on both sides. In a large pan, heat 2 teaspoons of olive oil on medium-high until hot. Add the seasoned steaks and cook 3 to 4 minutes per side for medium-rare, or until browned and cooked to your desired degree of doneness.


6. Leaving any browned bits (or fond) in the pan, transfer to a cutting board. Loosely cover the cooked steaks with aluminum foil and let rest for at least 5 minutes.


7. While the steaks rest, add the radishes to the pan of reserved fond and season with salt and pepper. (If the pan seems dry, add 1 teaspoon of olive oil.) Cook on medium-high, stirring occasionally and scraping up any fond, 1 to 2 minutes, or until slightly softened.


8. Add the asparagus and season with salt and pepper. Cook, stirring occasionally, 2 to 4 minutes, or until lightly browned and softened. Add up to half the garlic paste and cook, stirring constantly, 30 seconds to 1 minute, or until fragrant. Turn off the heat. Stir in the roasted potatoes and the juice of 2 lemon wedges.

9. While the vegetables cook, in a medium bowl, combine the parsley, capers, the juice of the remaining lemon wedges, and as much of the remaining garlic paste as you'd like. Slowly whisk in 2 tablespoons of olive oil until well combined. Season with salt and pepper to taste.

10. Find the lines of muscle (or grain) on the rested steaks; thinly slice crosswise against the grain. Divide the finished vegetables and sliced steaks between 2 dishes. Top the steaks with the salsa verde. Enjoy!


Thoughts: Of the three recipes, this was the simplest and quickest to make. The ingredients weren’t too unusual, so it would be easy to recreate in the future. It would be an impressive way to serve steak for guests.